How to Publish Your Copilot to a Website | Copilot Studio Day 52
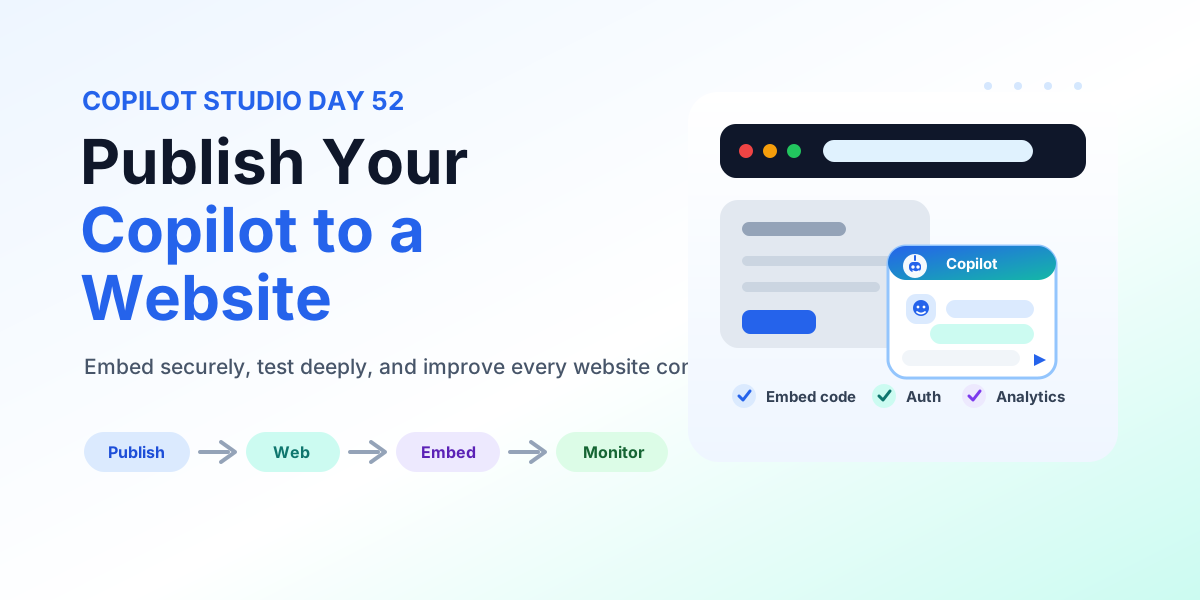
Learn how to publish a Copilot Studio agent to a website with web channel setup, embed code placement, authentication, data protection, testing, accessibility, monitoring, and production deployment checks.
- Published
- Reading time
- 12 min read
Week 8 · Day 52 of 365 in 365 Days of Copilot Studio — view the full series
What you’ll learn
- Why Publish a Copilot to a Website?
- Before You Start
- Publish the Copilot First
- Open Channels and Choose the Website Channel
- Demo Website vs Production Website
On this page (23 sections)
Day 52 of 365 Days of Copilot Studio explains how to publish your Copilot to a website after the agent has been built, tested, and prepared for real users.
A website deployment is different from a Microsoft Teams deployment. Teams is usually an internal work channel. A website can be public, partner-facing, customer-facing, employee-facing, or embedded inside an intranet portal. That means the deployment decision affects user experience, authentication, data access, support, compliance, and monitoring.
This lesson builds on Day 44: Publishing Your Copilot, Day 41: Testing Your Copilot, Day 50: Best Practices Checklist, and Day 51: Publish Copilot to Microsoft Teams.
[!NOTE] Treat a website copilot as a production user experience, not just an embedded chat window. The quality of the answers, security model, placement, and monitoring rhythm all affect whether users trust it.
Why Publish a Copilot to a Website?
Publishing Copilot Studio to a website can make support and self-service available where users already are. Instead of asking users to switch apps, the copilot can answer questions, guide actions, collect intent, and route users from the page they are using.
| Website scenario | What the copilot can help with | Example |
|---|---|---|
| Customer support site | Answer common questions and reduce simple support requests. | Product FAQ, order support, warranty guidance, or pricing help. |
| Employee intranet | Help employees find policies, forms, services, and internal procedures. | HR help, IT support, onboarding, benefits, or leave questions. |
| Partner portal | Guide external users through controlled information and next steps. | Partner program guidance, document requests, or service status checks. |
| Product or service page | Provide contextual help while the user is evaluating an offer. | Plan comparison, feature explanation, or qualification questions. |
Before You Start
Do not embed an unfinished copilot into a production website. First validate the agent itself. Website users may be anonymous, external, mobile, impatient, or unfamiliar with your internal language. A weak experience becomes visible quickly.
- Test conversations: confirm key responses are accurate, natural, and useful.
- Validate knowledge: use approved, current, business-owned content.
- Check actions: test flows, connectors, APIs, and downstream systems.
- Review authentication: decide whether users must sign in and what identity model applies.
- Publish latest changes: make sure the website channel receives the tested version, not a stale draft.
Publish the Copilot First
Publishing is the release step that makes the tested version available to channels. If you configure a website channel before the agent is ready, users may receive incomplete behavior, old instructions, missing topics, or untested actions.
- Open the copilot: go to Copilot Studio and open the agent you want to deploy.
- Run final tests: validate conversations, knowledge, actions, authentication, and fallback paths.
- Select Publish: release the approved version so connected channels can use it.
- Confirm the version: make sure the latest intended changes are live before website testing.
Open Channels and Choose the Website Channel
Channels define where users interact with your copilot. For a web deployment, open the copilot in Copilot Studio, go to Channels, and choose the website option that matches how users will access the experience.
The website channel should be selected based on the actual audience. A demo page is useful for quick validation. A production website requires stronger controls, brand alignment, accessibility checks, monitoring, support ownership, and deployment coordination with the web team.
Demo Website vs Production Website
The PDF source makes an important distinction: a demo website is not a production deployment. Use the demo site to learn and validate quickly. Use the production site only when the copilot is ready for real users.
| Area | Demo website | Production website |
|---|---|---|
| Purpose | Testing, demonstration, and quick validation. | Real user support, customer service, intranet help, or partner assistance. |
| Audience | Makers, testers, stakeholders, and reviewers. | Employees, customers, partners, or public visitors. |
| Risk level | Lower, because access and traffic are controlled. | Higher, because real users rely on the experience. |
| Required controls | Basic conversation, knowledge, and action checks. | Security, privacy, accessibility, monitoring, support, and change management. |
Try the Demo Website First
The demo website is the fastest way to see how the copilot behaves outside the authoring canvas. It helps validate the web chat experience before the web team adds the widget to a real page.
Use the demo website to check:
- Conversation quality: greetings, prompts, topic routing, follow-up questions, and response tone.
- Knowledge answers: accuracy, source relevance, freshness, and gaps.
- Basic behavior: fallback, error messages, response formatting, and handoff options.
- Action behavior: whether connected flows, connectors, and APIs work as expected.
Configure the Website Experience
A website copilot should feel like part of the site, not an unrelated pop-up. Configure the visible experience before production deployment.
- Theme: align colors and visual style with the website or intranet brand.
- Welcome message: explain what the copilot can help with in one or two clear sentences.
- Language: choose the expected language and test international users where relevant.
- Conversation starters: add useful first-click options so users do not start from a blank box.
- Security and privacy: communicate sign-in, data use, and support expectations clearly.
Get the Website Integration Details
Copilot Studio provides the integration details needed to add the copilot to a website. Depending on the configuration, the web team may need values such as an integration ID, client key, endpoint URL, or embed code.
Treat these values as deployment configuration. They should be copied carefully, stored securely where appropriate, reviewed during release, and used only on approved sites.
Security rule: Do not paste website integration details into random test pages, shared documents, or unapproved environments. Keep production embed configuration controlled by the website or platform owner.
Add Copilot to the Website
Once the website channel is configured and the integration details are ready, the web team can add the copilot widget to the site. The practical process usually looks like this:
- Copy the embed code: get the website integration script or markup from Copilot Studio.
- Add it to the site: place the script in the approved page template, layout, tag manager, or component area.
- Position the widget: make it visible without blocking primary content or critical buttons.
- Save and publish the website: release the web change through the normal deployment process.
- Validate live behavior: test the copilot from the actual page users will visit.
Choose the Right Placement
Widget placement affects adoption. A copilot that is hidden will be ignored. A copilot that blocks content will frustrate users. Choose placement based on the page purpose.
| Placement | When it works well | Watch out for |
|---|---|---|
| Floating bottom-right widget | General support, product help, and customer-facing pages. | Overlap with cookie banners, chat tools, mobile navigation, or checkout buttons. |
| Floating bottom-left widget | Sites where bottom-right is already used by support or accessibility controls. | User expectations may vary because many chat widgets appear on the right. |
| Inline page embed | Dedicated support pages, intranet help pages, or guided self-service pages. | The copilot may receive fewer casual questions if users must navigate to one page. |
Design for Conversation
The website experience should guide users into useful conversations. A good web copilot starts with clear scope, helpful prompts, and a tone that matches the organization.
- Write a strong welcome message: tell users what the copilot can do and set realistic expectations.
- Add conversation starters: include common tasks such as pricing, policy lookup, service request, order help, or contact support.
- Keep it focused: avoid making one website copilot responsible for every possible business process.
- Use natural language: write responses in plain, helpful language instead of internal system wording.
- Reflect brand voice: keep tone consistent with the site, support model, and audience.
Consider Authentication
Authentication is one of the most important website deployment decisions. A public product FAQ may be anonymous. An employee support agent, partner assistant, or action-enabled copilot usually needs sign-in.
| Use case | Authentication approach | Reason |
|---|---|---|
| Public marketing FAQ | Anonymous may be acceptable. | The content is already public and no personal action is required. |
| Employee intranet assistant | Microsoft Entra ID sign-in is usually required. | Answers and actions may depend on employee identity and internal permissions. |
| Customer account support | Authenticated customer identity is usually required. | The copilot may access account-specific or transactional information. |
| Action-enabled process | Authentication and authorization should be validated end to end. | The agent may create records, send messages, submit requests, or retrieve protected data. |
Protect Business Data
Website publishing increases exposure. Even if the widget looks simple, the agent may connect to knowledge sources, actions, Microsoft 365 services, Dataverse, SharePoint, Power Automate, or external APIs. Review what the copilot can access and what it can reveal.
- Limit data access: allow only the sources and actions needed for the website use case.
- Use Microsoft security controls: rely on identity, DLP, conditional access, and role-based access where applicable.
- Follow data governance: classify content, manage ownership, and review retention or compliance requirements.
- Avoid personal dependencies: production website actions should not depend on one maker's personal connection without governance.
Test as a Real Website User
After embedding the copilot, test from the website, not only from Copilot Studio. The browser, device, authentication flow, site layout, cookies, script loading, and page context can all affect the experience.
- Open the website as a normal user, not only as an administrator.
- Test on desktop and mobile if both are supported.
- Ask realistic questions using the language users would actually type.
- Validate authentication prompts and sign-in behavior.
- Run connected actions end to end with realistic permissions.
- Confirm fallback and support handoff behavior.
- Check performance, loading behavior, placement, and responsive layout.
Test Connected Actions
Connected actions are often the difference between a helpful web assistant and a production risk. If the copilot creates tickets, sends emails, starts flows, reads SharePoint content, updates Dataverse rows, or calls APIs, test every action with both successful and failed inputs.
| Action check | What to validate |
|---|---|
| Permissions | The user and connection have only the access required for the scenario. |
| Inputs | The copilot collects required fields and validates incomplete or invalid values. |
| Success response | The user receives a clear confirmation, reference number, or next step. |
| Error response | The copilot explains what happened and offers a useful recovery path. |
| Data accuracy | Created or returned data is correct, traceable, and compliant with the business process. |
Handle Errors Gracefully
Website users may abandon the experience quickly if errors feel technical or unhelpful. Plan error handling before launch.
- Show clear messages: explain the issue in simple language without exposing technical details.
- Offer next steps: provide retry, contact support, create ticket, or view help options.
- Allow safe retry: let users retry without losing important context where possible.
- Log recurring errors: track repeated failures so the team can improve flows, topics, and integrations.
Do Not Forget Accessibility
A website copilot should be usable by everyone. Accessibility is part of production quality, especially for public websites, government services, education, healthcare, and global organizations.
- Use clear and simple language in messages and buttons.
- Check keyboard navigation so users can operate the experience without a mouse.
- Maintain readable contrast between text, controls, and backgrounds.
- Support assistive technologies where the site and widget configuration allow it.
- Add descriptive text for relevant page images and avoid relying only on visual cues.
Monitor Website Conversations
Deployment is not finished when the widget appears on the page. Monitor usage so the copilot improves from real conversations.
Review signals such as total conversations, user satisfaction, resolution rate, fallback frequency, top topics, failed actions, unresolved questions, repeated confusion, and pages where users start conversations. Day 43 covers this broader discipline in Conversation Analytics in Microsoft Copilot Studio.
Improve Using Real Conversations
Real conversations reveal what users actually need. Review patterns regularly and turn them into backlog items.
- Add missing topics: create or refine topics for repeated questions.
- Update content: improve weak knowledge sources and remove stale material.
- Refine responses: make answers shorter, clearer, and more actionable.
- Improve actions: reduce unnecessary steps and make success messages more useful.
- Republish after changes: test updates and publish the improved version to the website channel.
Common Website Deployment Mistakes
The most common mistakes are not technical syntax errors. They are experience, scope, and governance problems.
| Mistake | What happens | Better approach |
|---|---|---|
| Poor instructions or weak knowledge | The copilot gives vague, incomplete, or wrong answers. | Use clear instructions and approved, current knowledge sources. |
| Not providing enough context | Answers are generic and do not solve the user's real problem. | Define user goals, audience, constraints, and expected outcomes. |
| Ignoring brand tone | The copilot feels disconnected from the website experience. | Review welcome message, prompts, and responses for tone and consistency. |
| Skipping real-user testing | The widget works for makers but fails for normal users. | Test with real accounts, realistic questions, and multiple devices. |
| No monitoring plan | The team misses recurring gaps and action failures. | Assign an owner for analytics review, issue triage, and continuous improvement. |
Recommended Website Deployment Flow
- Define goals and scope: identify the audience, use cases, content boundaries, success measures, and support owner.
- Design and build: create topics, instructions, knowledge, actions, conversation starters, and fallback paths.
- Test thoroughly: validate conversations, knowledge, actions, authentication, accessibility, and web placement.
- Handle errors and accessibility: prepare clear error messages, support paths, keyboard behavior, and readable UI.
- Deploy and publish: embed the approved version on the website through the normal release process.
- Monitor and analyze: review conversations, failed actions, user satisfaction, and unresolved questions.
- Improve continuously: update content, refine responses, add missing topics, test again, and republish.
Website Deployment Checklist
- Goal, audience, owner, and success metrics are defined.
- Website channel is configured for the right environment and audience.
- Demo website testing is complete.
- Production embed code is added only to approved pages.
- Widget placement works on desktop and mobile.
- Welcome message and conversation starters are clear.
- Authentication and permissions are validated with realistic users.
- Business data access is reviewed and limited to the use case.
- Connected actions are tested for success, failure, and security.
- Error handling, fallback, and support handoff are ready.
- Accessibility checks are complete.
- Monitoring ownership and improvement rhythm are assigned.
Key Takeaway
Publishing a Copilot Studio agent to a website is more than copying embed code. A successful website deployment requires a tested published version, the right web channel configuration, thoughtful placement, clear conversation design, authentication decisions, data protection, accessibility, monitoring, and continuous improvement.
The goal is not only to make the copilot visible on a page. The goal is to deliver a secure, useful, and trusted web assistant that helps users complete real tasks.
Related resources
Topics covered
AI Agents · Security · Governance · Conversation Design · Integrations
Frequently asked questions
Can I publish a Copilot Studio agent to a website?
Yes. After the agent is tested and published, you can configure a website channel and embed the Copilot Studio web experience into an approved site using the integration details provided by Copilot Studio.
Should I test the demo website before embedding the copilot on my production site?
Yes. Use the demo website first to validate conversation flow, answers, prompts, knowledge, actions, authentication behavior, and error handling before adding the copilot to a real website.
Where should I place the Copilot widget on a website?
Place it where users naturally need help. Common patterns include a floating bottom-right widget, a support page embed, or a contextual help area. Keep placement consistent and avoid blocking critical page content.
Do I need authentication for a website copilot?
It depends on the use case. Public FAQ agents may not need sign-in, but employee, partner, support, HR, finance, or action-enabled agents usually need authentication and permission validation.
What should I monitor after publishing Copilot Studio to a website?
Monitor total conversations, resolution rate, fallback topics, failed actions, user satisfaction, unanswered questions, authentication issues, and recurring user intents so the agent improves over time.
Sources
Have a Microsoft 365 topic idea?
Share article suggestions, community session ideas, corrections, or real-world scenarios for future nextM365 learning notes.
Keep learning Microsoft 365
Explore more practical tutorials for SharePoint, Power Platform, Copilot Studio, migration, automation, governance, and security.
Continue learning
Related tutorials
Related questions
Related comparisons