Power Automate Approval Workflows Explained
Learn how Power Automate approval workflows work, including approval types, manager decisions, reminders, SharePoint records, Teams alerts, and best practices.
- Published
- Reading time
- 6 min read
Before you start
Is this guide for you?
- Best entry point
- Power Automate
- Time investment
- 6 min read
In this article
- What are Power Automate approval workflows?
- Why approval workflows matter
- How a Power Automate approval workflow works
- Common approval workflow use cases
- Approval types in Power Automate
On this page (17 sections)
Power Automate approval workflows help organizations automate decisions that usually move through email, chat, spreadsheets, or manual follow-up. Instead of sending a request and waiting for someone to remember it, a cloud flow can route the approval, collect the decision, update the record, notify the requester, and keep an audit trail.
Approvals are useful for Microsoft 365 teams in the USA, Canada, Australia, the UK, India, and other regions because the pattern is familiar: someone requests something, the right person approves or rejects it, and the business process continues with a clear outcome.
This article explains approval workflows in beginner-friendly language and connects them to common Microsoft 365 tools such as SharePoint, Teams, Outlook, and Power Automate cloud flows. If you are new to cloud flows, start with Power Automate Cloud Flows Explained.
What are Power Automate approval workflows?
A Power Automate approval workflow is a cloud flow that asks a person or group to make a decision. The decision can be simple, such as approve or reject, or more specific, such as approve, reject, request changes, or escalate.
The flow normally starts from a trigger, such as a SharePoint item being created, a Microsoft Forms response being submitted, a button being selected, or a scheduled review starting. Power Automate then sends the approval request, waits for the response, and runs the next actions based on the outcome.
Why approval workflows matter
Approval processes often fail because they depend on manual tracking. Requests get buried in email, approvers miss messages, requesters do not know the status, and teams struggle to prove who approved what. Power Automate helps by making the process repeatable.
- Faster decisions: approvers receive a clear request with the details they need.
- Better visibility: requesters and owners can see status instead of chasing updates.
- Cleaner records: SharePoint, Dataverse, Excel, or other systems can store the final result.
- Less manual follow-up: reminders and notifications can be automated.
- Improved governance: approval comments, dates, and approvers can be retained for audit needs.
How a Power Automate approval workflow works
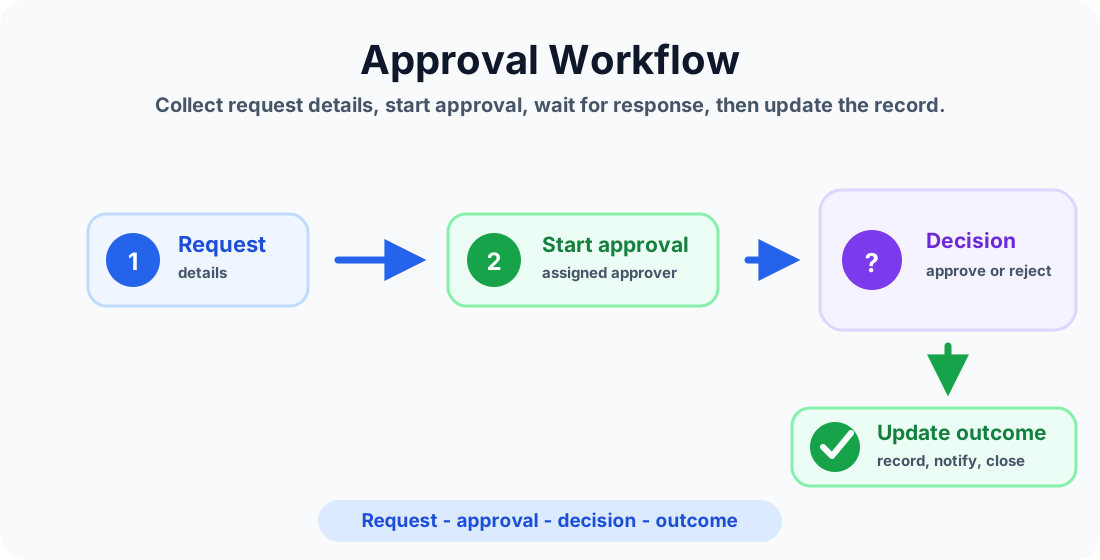
Most approval workflows follow the same structure:
- Capture the request. Collect the requester, business reason, amount, dates, document, or access details.
- Start the approval. Send the approval to the correct person or group.
- Wait for a decision. Power Automate pauses until the approver responds or the process reaches a timeout.
- Check the outcome. Use a condition to separate approved, rejected, or custom response paths.
- Update the system. Write the result back to SharePoint, Dataverse, a ticket, or another business system.
- Notify people. Send the requester and relevant teams a clear result message.
For the decision step, use Condition or Switch in Power Automate when the flow needs different paths for approved, rejected, escalated, or returned requests.
Common approval workflow use cases
Leave requests
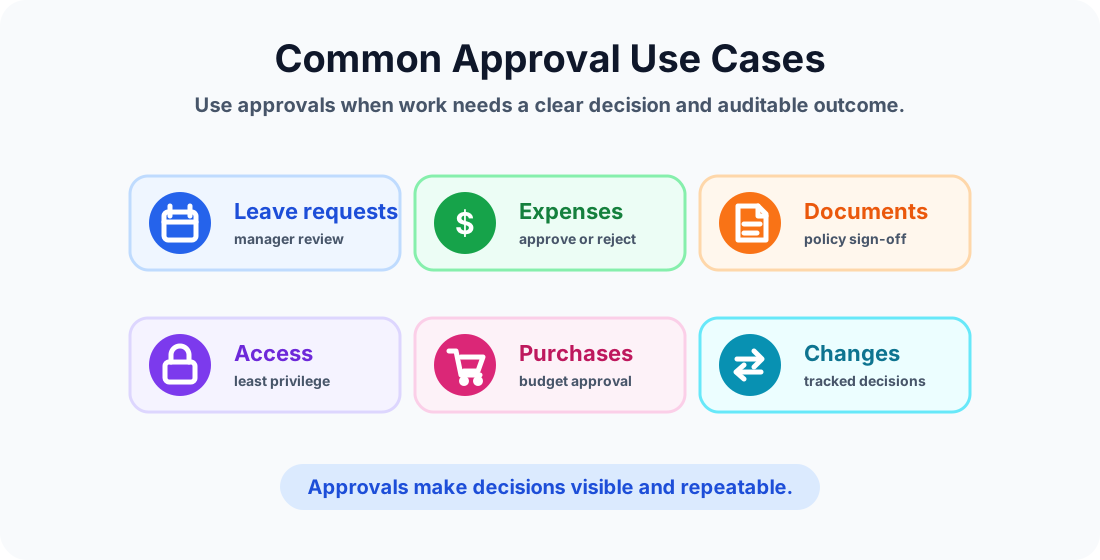
A leave request flow can collect start date, end date, leave type, reason, and manager. The flow sends an approval to the manager, updates the request status, and emails or messages the employee with the result.
Expense approvals
An expense approval flow can route claims based on amount, department, project, or cost center. Small claims can go to a direct manager, while larger claims can require finance or leadership approval.
Document sign-off
SharePoint document libraries often need review before publishing a policy, proposal, procedure, or customer document. A flow can send the document link to reviewers, capture approval comments, and update metadata when the document is approved.
Access requests
Teams, SharePoint, application, or group access requests should be controlled. An approval workflow can confirm the business need before adding a user, creating a ticket, or notifying an admin team.
Purchase and vendor approvals
Purchasing workflows can collect vendor name, item details, budget owner, requested amount, and urgency. The approval path can change based on cost, department, or procurement rules.
Approval types in Power Automate
Choose the approval type based on the business rule. Do not use the same pattern for every process.
| Approval type | Use it when | Example |
|---|---|---|
| First to respond | Any one approver can make the decision. | IT access request reviewed by the first available support lead. |
| Everyone must approve | All listed approvers must approve before continuing. | Policy update needing HR, legal, and compliance sign-off. |
| Sequential approvals | Approval must move step by step. | Manager approval first, finance approval second. |
| Custom responses | Approve and reject are not enough. | Approve, reject, request changes, or escalate. |
| Conditional approval paths | The approver depends on request data. | Expenses over a threshold go to finance leadership. |
Example: simple leave request approval
A beginner leave request approval can use a SharePoint list as the request database.
- The employee submits a Microsoft Forms response or creates a SharePoint list item.
- The cloud flow reads the employee, dates, leave type, and manager.
- Power Automate sends an approval to the manager.
- If approved, the flow updates the list item to Approved and notifies the employee.
- If rejected, the flow stores the rejection comments and notifies the employee.
If the flow needs calculated dates, dynamic messages, or fallback values, use Power Automate expressions to keep the logic cleaner.
What data should an approval request include?
An approver should not need to search for context. Include the details required to make the decision directly in the approval card or linked record.
- Requester name and department
- Business reason
- Requested dates, amount, access level, or document link
- Priority or due date
- Related SharePoint item, document, ticket, or record link
- Clear approve, reject, or custom response options
SharePoint, Teams, and Outlook in approval workflows
Power Automate approvals usually work best when each Microsoft 365 service has a clear role.
- SharePoint: stores requests, status, comments, files, and metadata.
- Teams: alerts approvers, requesters, and support teams where they already work.
- Outlook: sends formal approval and result notifications.
- Power Automate: controls the process, decision paths, reminders, and updates.
For SharePoint-heavy processes, keep list columns simple and meaningful. Avoid storing every detail only inside email bodies, because reporting and audit become harder later.
Best practices for Power Automate approval workflows
- Use clear approval titles. The approver should understand the request before opening it.
- Store the approval ID and outcome. This helps with troubleshooting and reporting.
- Log comments. Approval comments explain why a decision was made.
- Handle both approved and rejected paths. Do not leave rejected requests without a clear update.
- Add reminder logic carefully. Reminders are useful, but too many reminders create noise.
- Use variables only when they make the flow clearer. See Variables in Power Automate Explained.
- Test with real approver scenarios. Include approvals, rejections, comments, missing manager data, and delayed responses.
Common mistakes to avoid
- No source of truth. Every approval should update a reliable record, not only send emails.
- Missing rejection handling. Rejected requests still need status, comments, and requester notification.
- Too much information in one approval. Keep the approval card readable and link to the full record if needed.
- Hard-coded approvers everywhere. Use request data, manager fields, SharePoint lists, or configuration where possible.
- No ownership. Assign a business owner who understands the approval rule, not just the flow builder.
Testing checklist
Before publishing an approval workflow, test these cases:
- New request submitted successfully
- Approver receives the correct details
- Approved path updates the record correctly
- Rejected path stores comments and notifies the requester
- Teams and Outlook notifications use clear wording
- Large requests route to the correct higher approver
- Missing manager, missing email, or invalid data is handled
- Reporting fields are populated for audit and follow-up
Summary
Power Automate approval workflows are one of the most practical ways to automate Microsoft 365 business processes. Start with a clear request record, send the approval to the right person, handle each outcome, update the source system, and notify users with a clear result.
Good approval workflows do more than ask for a decision. They make the decision visible, traceable, and easy to act on.
Tagged
Cloud Flows · Workflow Automation · Conditions · Connectors · Governance
Frequently asked questions
What is a Power Automate approval workflow?
A Power Automate approval workflow is a cloud flow that sends a request to one or more approvers, waits for a decision, then updates records, sends notifications, or continues the business process.
What approval types are available in Power Automate?
Common approval patterns include first to respond, everyone must approve, sequential approvals, custom responses, and approval actions that are part of a larger cloud flow.
Can Power Automate approvals use SharePoint lists?
Yes. SharePoint lists are often used to store request details, approval status, comments, approver names, dates, and final outcomes for audit and reporting.
Can approval workflows send Teams and Outlook notifications?
Yes. Power Automate approval flows can notify approvers and requesters through Outlook email, Microsoft Teams messages, approval cards, and follow-up reminders.
What is a good beginner approval workflow example?
A leave request flow is a good beginner example: the user submits a request, the manager approves or rejects it, the SharePoint item is updated, and the employee receives the result.
How do I make approval workflows reliable?
Store request data clearly, use meaningful approval titles, handle approved and rejected paths, log comments, add timeout or reminder logic, and test with real approver scenarios.
Sources
- Microsoft Learn: Get Started Approvals, Microsoft
- Microsoft Learn: Power Automate, Microsoft
Have a Microsoft 365 topic idea?
Share article suggestions, community session ideas, corrections, or real-world scenarios for future nextM365 learning notes.
Keep learning Microsoft 365
Explore more practical guides for SharePoint, Power Platform, Copilot Studio, migration, automation, governance, and security.
Continue learning
Related tutorials
Related questions
Related comparisons
Next action